
Introduction
Who hasn’t wanted to design their own beautiful website without having to do any coding at all? Thanks to platforms like WordPress, page builders, and website building services like Wix and Weebly, this has been possible for a while. In this webflow tutorial, you’ll get to know one more possibility.
The sites produced with the options above can be a bit repetitive. You can usually spot them from a mile away. Webflow is an online tool that promises to do away with that.
It promises to revolutionize website building, allowing you to design a fully-featured, gorgeous business website without needing to write a single line of code. In addition, from hosting to client billing, everything else you need is also right in the app.
If you’re ready to take full advantage of this incredibly powerful platform, in this tutorial we’ll go over everything to do with Webflow and take you on a tour of the back end.
What Exactly is Webflow
Webflow is web design tool as well as a hosting platform and CMS all in one. While you are probably familiar with all of these, they are usually entirely separate tools.
Webflow is similar to WordPress in that it offers content management and website building tools. However,it comes with a heavier focus on design, and hosting included in the package.
In short, it’s the best of all worlds. Everything you need is here in one platform. No need to try and cobble all the features you need together in the form of plugins By using Webflow, you can skip even having to deal with third-party hosting.
Webflow is made for small businesses, so it naturally comes with e-commerce support. Build an online store or any other kind of website with dynamic content thanks to the CMS and customizable database. Or, if you’re a freelancer or agency building sites for others, bill clients without having to deal with clunky outside apps.
Furthermore, as a web designer, Webflow isn’t just suitable for launching full websites. It’s also a great prototyping tool to deliver interactive mock-ups. Show off ideas, or export your code and use it anywhere.
As long as its starter plan fits your needs, Webflow is free to try. So along with all these great features, you could start using it without having to pay anything.
What's the Catch ?
There’s no “gotchas” here. The free plan is a bit limited to encourage you to upgrade, but you’re allowed to keep using it for as long as you’re enjoying Webflow’s features.
Without paying anything at all, here’s what you are able to do:
- Explore the fully-featured Designer and make use of all the website building tools.
- Create two unhosted projects with two pages. (If you purchase a site plan, you’ll be able to go live and add up to 100 pages.)
- Publish projects as prototypes to Webflow’s staging subdomain.
- Bill clients from within the Webflow app.
This is great if you want to just play around with the editor, make a prototype, and show it to your team on the staging website. But if you want to go live, or unlock features like team building or code export, you’ll need to upgrade your plan.
In that case, there are two types of Webflow plans: Site and Account plans.
Site plans are essentially for purchasing hosting. Every one includes backups, custom domain support, and of course super-fast web hosting. Higher tiers unlock more monthly visits, CMS database support, site search, and extra slots for content editors. There’s also a separate set of e-commerce plans that let you add more items to your store.
Account plans, on the other hand, enhance the back end design tools. You can just use the free plan and purchase hosting, but higher tiers get you more projects, more pages for your staging websites, white labeling, and project transfer.

There’s also a separate Team plan for those interested in Webflow’s collaborative tools. Work alongside your team in a shared dashboard with unlimited projects and all the features from the upgraded Account plans.
Exploring the Webflow Designer
You'll go through a number of useful tutorials and quick questions when you first open Webflow to help customize the experience for you. You can jump straight in by choosing a color and style.
If you are accustomed to this procedure, you may skip the tutorial; otherwise, it will walk you through the several tools that are available. The Designer is broken up into manageable chunks that each control a different aspect of your website.
- The WYSIWYG editor, which is live, serves as the canvas. To interact with elements, click or drag them.
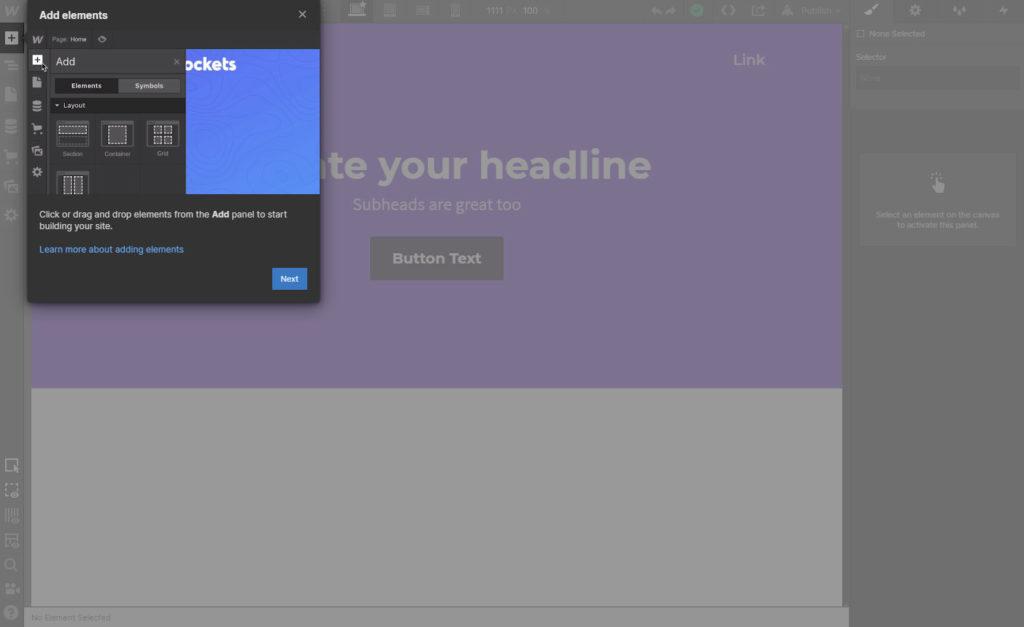
- You can drag and drop different items into the canvas from the Add panel (located in the top left corner). Add a form, modify the layout, or introduce a media block. These actually serve as the Designer's building components.
- You can style and edit elements that you drop into the Add panel using the Style panel (on the right). For instance, you can alter the appearance of a typography box, save the styling class, and then reuse it at a later time.
- The Navigator, which is located on the left beneath the Add panel button, functions as a scaled-down version of the live preview and displays the page's element hierarchy. You can drag and drop items to reorder them, much like on the canvas, and click to access the Style panel's options.
Observe the additional icons in the top left as well. You can alter the page you're viewing or its SEO settings using the Pages panel. The E-commerce panel allows you to create a store. Upload photos and documents that you can drop directly into your project using Assets.
Webflow's intuitive interface makes it accessible for both beginners and experienced designers. Its drag-and-drop functionality allows users to create complex layouts without any coding knowledge, making it a versatile tool for a wide range of projects.
While these basics provide a solid foundation, Webflow offers a plethora of advanced features that can elevate your web design projects to new heights. For instance, you can delve into interactions and animations to create dynamic, engaging user experiences.
Additionally, Webflow's CMS capabilities allow for the creation of complex, data-driven websites without the need for extensive backend development. As you become more familiar with the platform, you'll discover how to leverage these tools to streamline your workflow and enhance your design capabilities.


